On this page, you will find step-by-step instructions on how to order and manage your branding package.
Booking the Branding Package
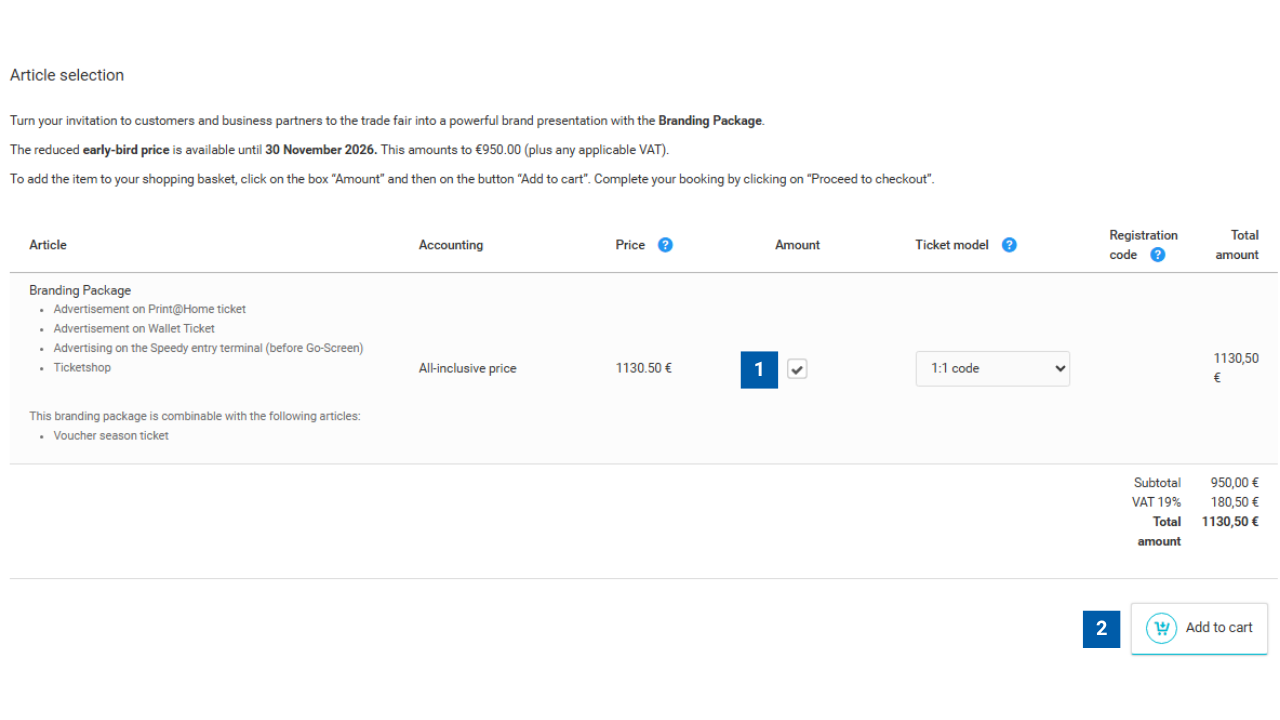
1. Select Branding Package
Tick the checkbox to select the desired Branding Package.
2. Add Branding Package to basket
Click “Add to Basket” to add the selected Branding Package to your basket. You can then proceed to complete your order.
Please note that all prices quoted include the applicable VAT.
Managing the Branding Package
In this section, you can manage your booked Branding Package and upload the required graphics. This allows you to customise selected elements of the ticketing process to reflect your brand and increase its visibility.
Important note: You can only manage and customise your Branding Package if you have already booked it.
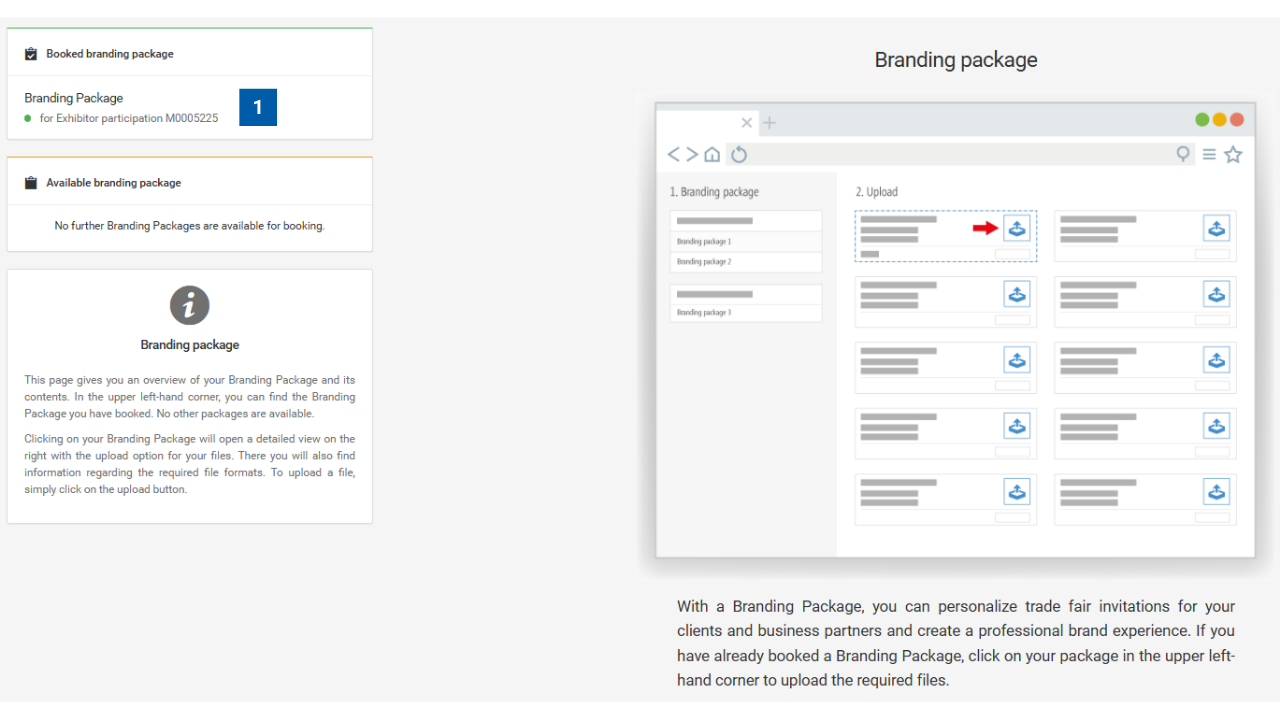
1. Select Branding Package
Click on your booked Branding Package to view the available branding options and manage your promotional graphics.
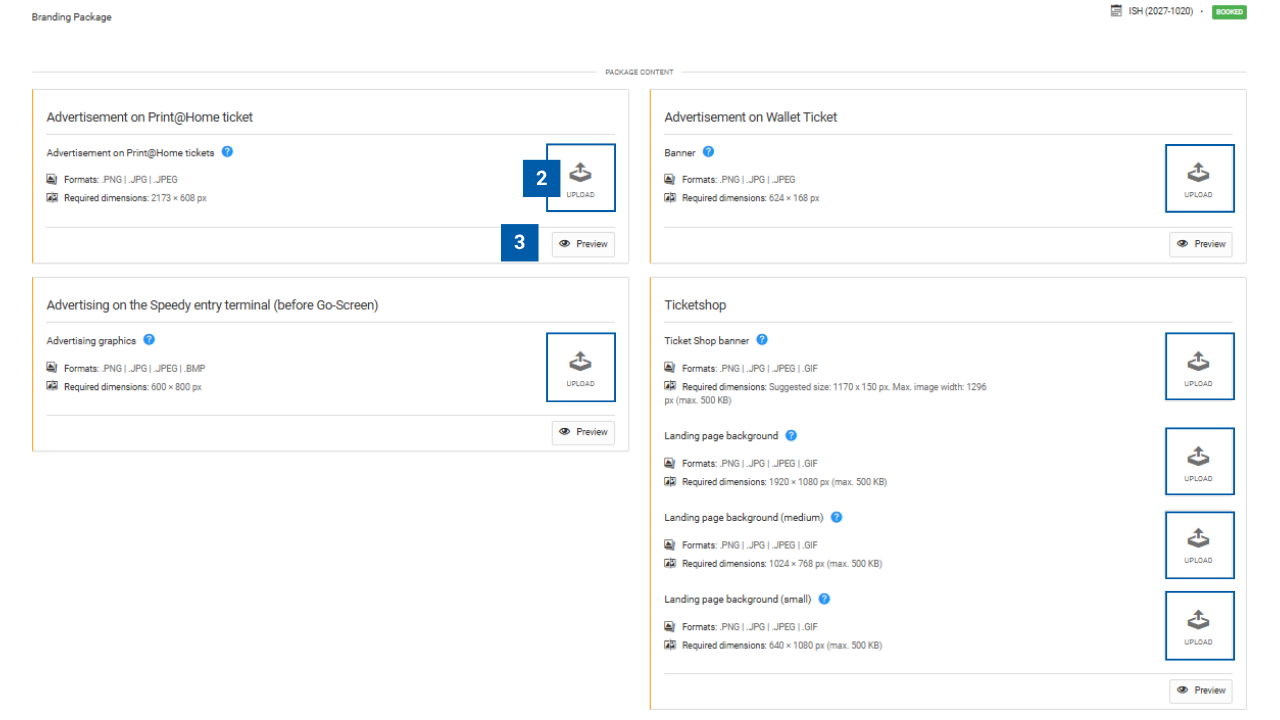
2. Upload Promotional Graphics
Once you have selected your Branding Package, the available advertising spaces will be displayed. These include promotional graphics for Print@Home tickets, wallet tickets, admission terminals and the ticket shop.
The accepted file formats and required image dimensions are displayed for each advertising space.
Click “Upload” to upload the relevant promotional graphic.
Note: An orange indicator highlights advertising spaces where a file still needs to be uploaded. A green indicator shows that a file has already been uploaded.
3. Preview Promotional Graphics
Click “Preview” to view and check your uploaded promotional graphics in their respective applications.
This allows you to check how your promotional graphics will appear, for example, on tickets or in the ticket shop.
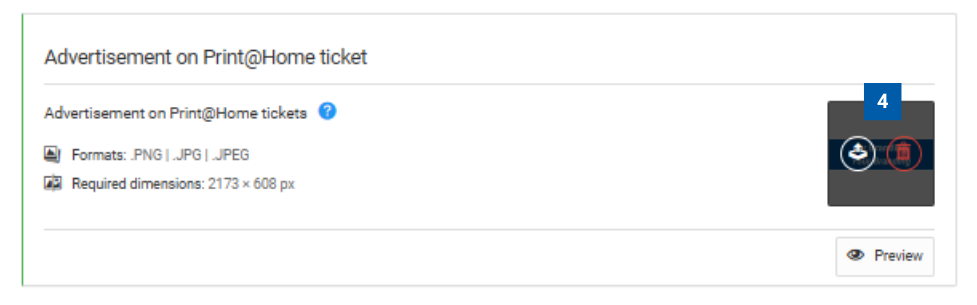
4. Update or Delete Promotional Graphics (if required)
You can manage your uploaded promotional graphics at any time.
Update: Click the upload icon to upload a new file and replace the existing promotional graphic.
Delete: Click the bin icon to remove a previously uploaded promotional graphic.
Note: When uploading or updating promotional graphics, ensure that your files meet the specified format and size requirements.
Viewing the email templates
In this section, you can view the email templates for inviting and registering your visitors. The templates are available in both German and English.
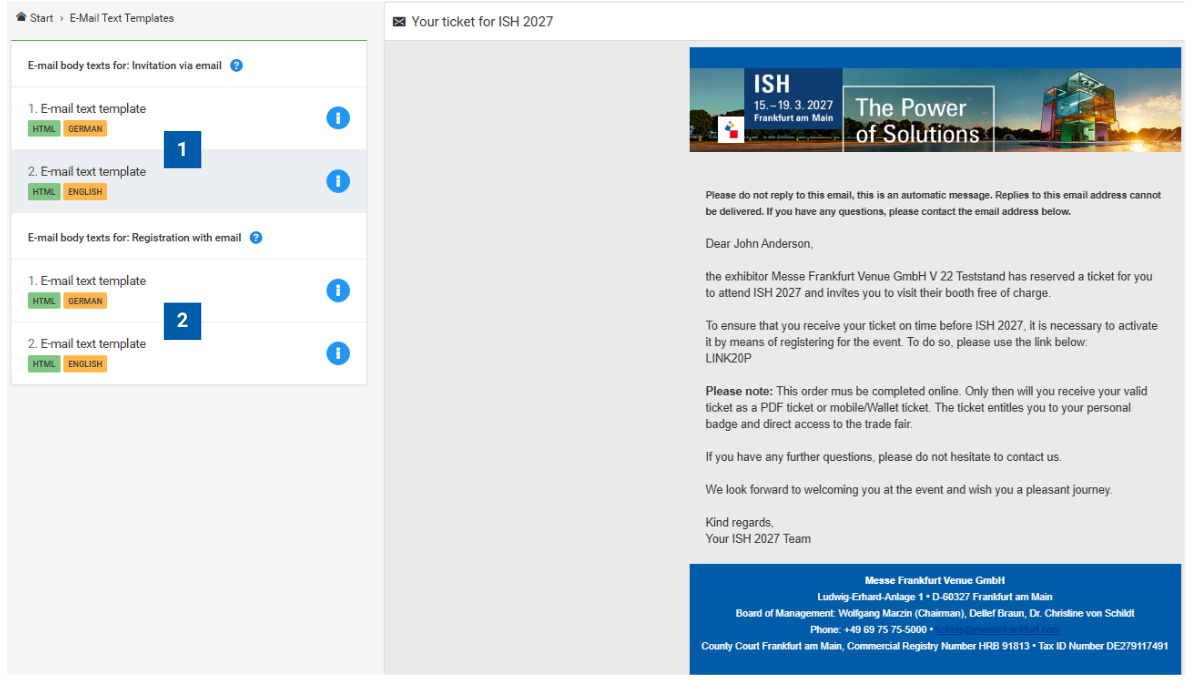
1. View email template for visitor invitations
Under “Email Texts for: Invitation by Email”, select the desired email template. You can choose between a German and an English version.
2. View email template for visitor registration
Under “Email Texts for: Registration with Email Confirmation”, select the desired email template. Both German and English versions are available.
Note: Once you have selected a template, a preview of the corresponding email will be displayed on the right. This allows you to review its content and layout. The templates cannot be edited.